Deleted
Deleted Member
Posts: 0
|
Post by Deleted on Jan 8, 2014 14:03:46 GMT
...Catchy title.  So following on from my Wreckers thread, here's some comparisons and tips on how to get a good photo of your most treasured items. I'm no photographer but as my dad used to say, "If you want to find the best way to do a job, give it to the lazy guy...". So for the comparison I've used the following 3 cameras: Canon EOS 550D Digital SLR with a standard lensCanon IXUS 960 IS Digital CameraHTC Windows Phone 8XThe studio is this £25 portable studio bought off eBay, deployed in my boy's bedroom with the curtains closed and no natural light. I also made use of a multifunctional altitude adjustment and stability device to assist with the shots. This is clearly visible in the centre of the below picture and has a shaving brush (for de-dusting) atop it. 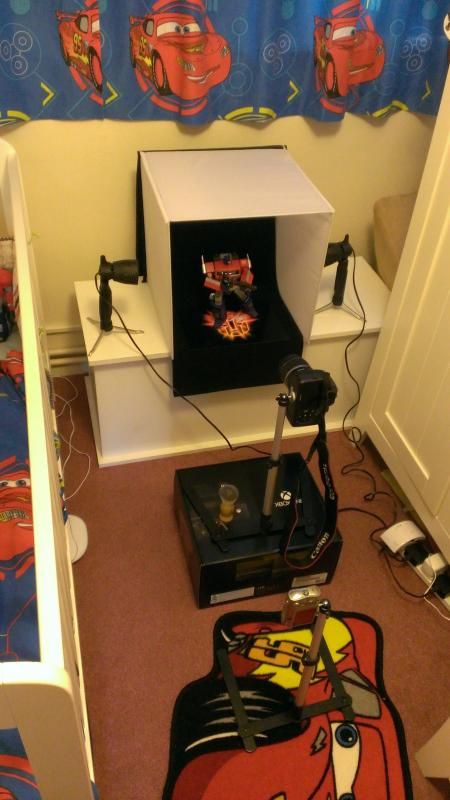 I'd like to take this opportunity to personally thank Mr Prime for agreeing to model for me on such short notice. Apparently he felt good photos are the right of all sentient beings (sorry...  ). First off then, the 550D. The automatic mode was used with no macro or other out-of-the-ordinary effect. I tried with and without flash and of the two, this one came up best (although it's hard to tell whether this was with or without). 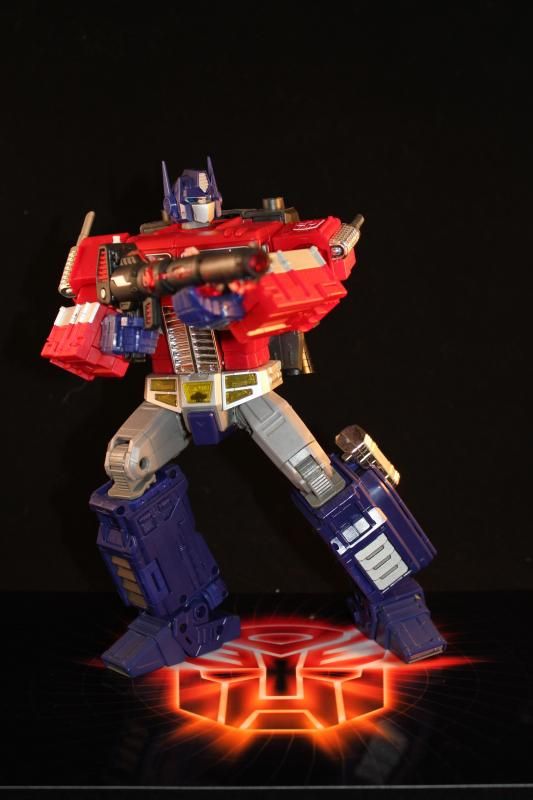 Again, with the IXUS I used the automatic mode. I did have problems getting the camera to focus where I wanted it to (his face) so ended up using an old trick I used when everything was automatic and focused on the centre: Point at a spot that's the right distance away, half press the button then rotate the camera back to take the shot you want. In this instance the camera stubbornly wanted to focus on the barrel of his gun so I aimed up until the gun was out-of-shot and half-pressed the button. It found his face so I then brought the camera back down to take the shot knowing it now had his face as the point of focus. 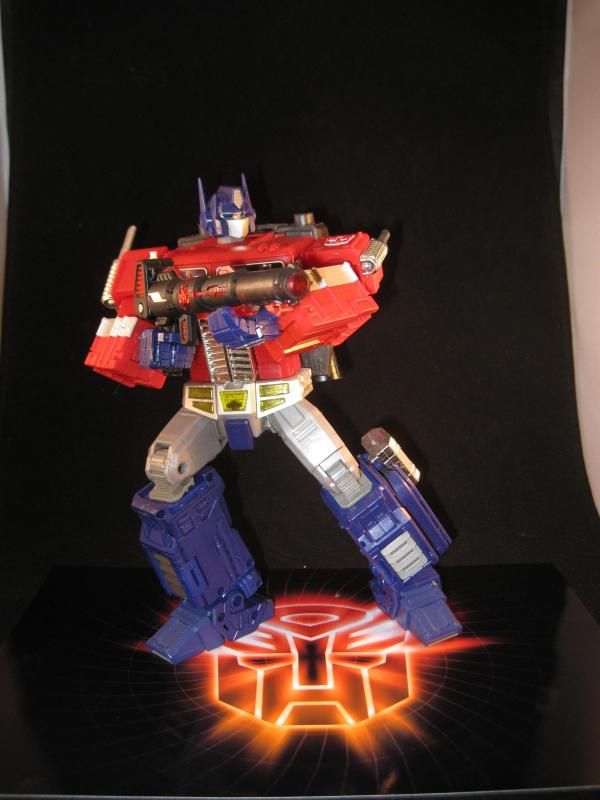 Lastly, the HTC Windows Phone (which by the way, doesn't take as good a photo as my wife's iPhone 4S). There was very little control I had over this shot but using the touch screen I could at least make the face the point of focus. I had to rest the phone on one of the camera stands and then used the 2-second delay function to minimise the amount of shake. Phone 'clasps' and similar can be found for other phone types with the iPhone even enjoying some special lenses as well. A top tip though is using the countdown because just the act of pressing the button will generate shake and possible gash-up your shot. 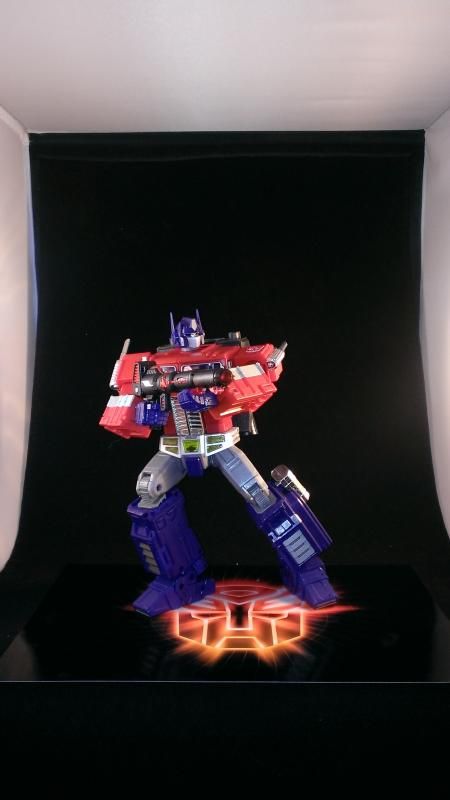 Now the same photos cleaned up in Windows Photo Viewer. All I did was crop it and then tinker with the brightness, contrast, highlights and shadows. This rudimentary post-production can be carried out on most photo-viewing applications - you don't need to shell out on the latest Photoshop. Now I've uploaded them I'm not happy at all with whatever I did with the IXUS shot. But you can see that although you get great results from an comparably expensive camera, if you're just photographing your collection for web use then it doesn't have that much over a cheap compact camera or your camera phone. The studio, however, is a must for giving your shots that professional look (mine even came with an extra freebie stand). 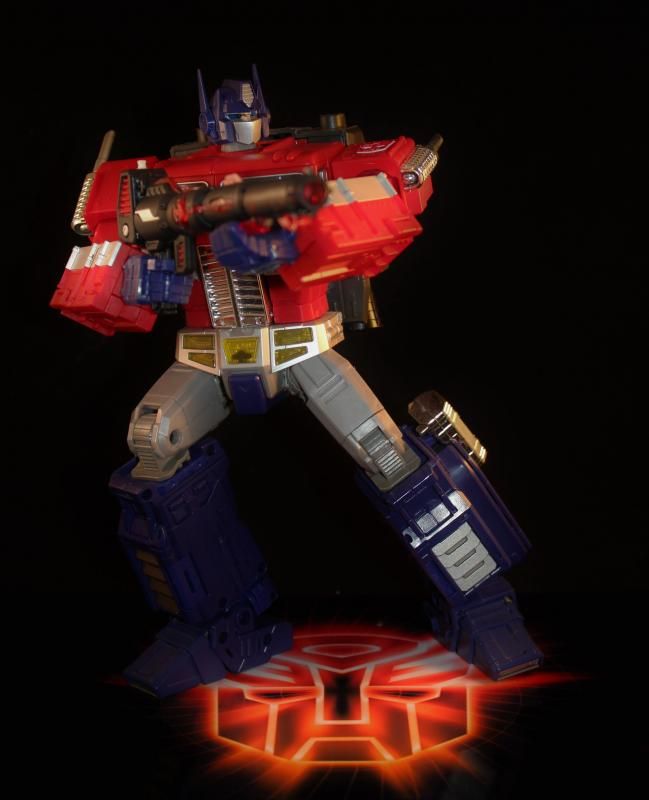 Canon 550D 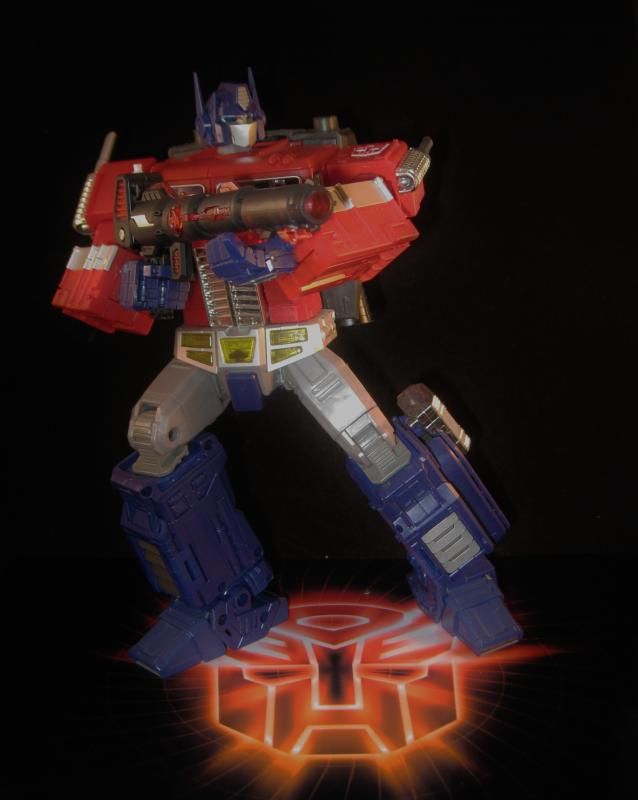 Canon IXUS 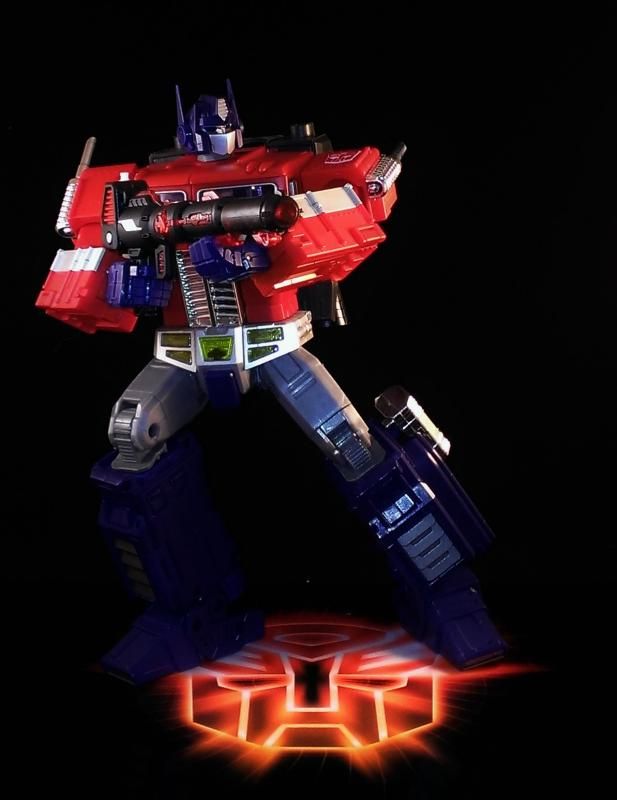 HTC Windows Phone 8X (I actually think this is my favourite) Hope this proves useful, if anyone has any questions then fire away! I'm off to snap my newest acquisitions and possibly snap my WFC/FOC lot. I'll be right back... |
|
|
|
Post by Pinwig on Jan 9, 2014 19:33:21 GMT
This has definitely given me something to think about and the comparisons between the cameras is nice to see too. I've got a range myself here, so I think I'm going to give my new year project idea a go and have a bash at this. I'll be ordering a mini studio shortly to get started. Thanks for taking the time to post all this Sifu, this has really inspired me.
|
|
|
|
Post by Bogatan on Jan 9, 2014 20:38:50 GMT
Yeah theres some good info here, will have to have another read of it next time I get the urge to takes some shots.
Comparisons are interesting, looks like the HTC takes the best macro shots, if you want the whole figure in focus which is interesting and possibly a little damning of the proper camera.
|
|
Deleted
Deleted Member
Posts: 0
|
Post by Deleted on Jan 10, 2014 0:47:52 GMT
I've been trying to figure out exactly why that shot looked so good and now you mention it, it's obvious: I used standard settings for the Canon shots, both of which have a dedicated macro mode (I also have a macro lens for the 550D). I can only assume that the phone automatically applied the macro, producing a more rounded picture in comparison to the other two... On a similar note, I've ordered this display from SirToys:  I'll take some time to apply some GW paint skill to it and get some shots done. It might prove a useful stage for some more dynamic shots... But lastly, I really have to share the other corker of a shot (with no post-production) to come out of the session. The gun is actually from a TFC Shadow Rollar I picked up at Auto Assembly two years ago. I'd forgotten it lights up until I went to remove Prime from his spot and clipped the button. It all got a bit action-packed after that. 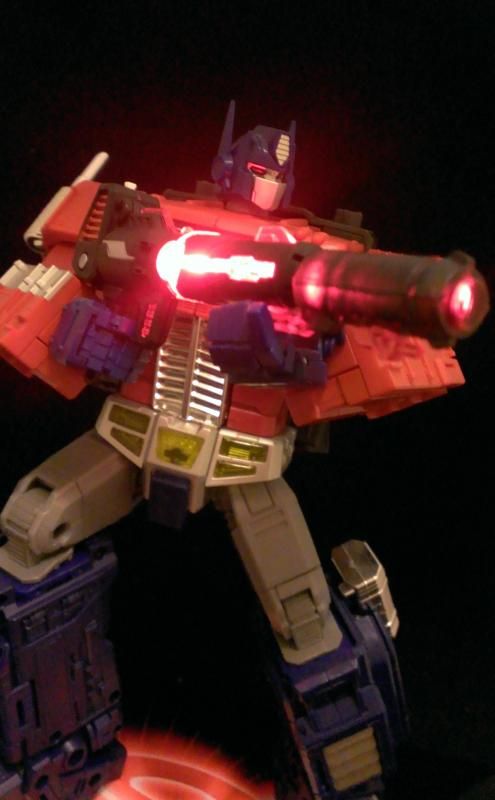 EDIT: I liked it so much, it had to become my new avatar.  |
|
|
|
Post by Pinwig on Jan 12, 2014 11:02:09 GMT
Be interesting to see how the lighting works on that stage without the sides of the mini studio to diffuse them. I did study lighting way back in the dim distant, so I'm familiar with key, flood and fill etc. Just could never get the reality to work properly.
As an aside, I also wanted to mention that one line in your first post has had an enormous impact on me. Like a lot of TF fans I think I'm pretty fussy about dust and the condition of toys. I am at the point of getting plexi glass display cases made for my Masterpieces because I cannot get my head into a place where I'm okay with them just sitting on a shelf gathering dust, so most of them stay in boxes at the moment.
Then I read your comment about using a shaving brush for dusting. Oh my word. Revelation. I had never thought of that. I bought one yesterday and had a genuinely ecstatic half hour bringing colour and life back to the toys and figurines I do have out on display. You have no idea how that lifted me mentally, it was literally like a weight coming off my shoulders knowing there is a simple and effective way to clean up display items. I have no idea why I never thought of that. I've always struggled with dusters. My Robert Harrop Judge Dredd statuette is suddenly blue again, and old stoney face thanks you for that.
|
|
|
|
Post by Shockprowl on Jan 12, 2014 20:35:13 GMT
Shaving brush for dusting???!!!!! Oh My God that's brilliant!
|
|
Deleted
Deleted Member
Posts: 0
|
Post by Deleted on Jan 12, 2014 21:11:02 GMT
Well, I'm glad that's proven useful. It was actually an evolution from a soft-bristled basting brush I was using. It was only when I inherited a cut-throat razor set from a buddy going home from Afghan that I thought, "Oooh... that's soft. Hmm... this gives me an idea." I've since upgraded to a silvertip brush to ensure 100% coverage with no chance of scratching. With regards to the 'set'. I'm a little worried about the light too but it actually comes as eight separate pieces I think. With any luck it will give me the deck and backdrop, leaving the sides open.  |
|
|
|
Post by Pinwig on Jan 25, 2014 18:50:15 GMT
Picked up my portable studio from the post office this morning and then went to my parents' house to dig a couple of 80 litre boxes of stored Transformers out of the loft, so the 2014 project to clean up and catalogue my collection is underway. I don't have a vast number of Transformers, not by others' standards (although my missus would disagree), but they are somewhat scattered and having opened one of these tubs I was confronted by a mess of Armada figures, so I may well be starting there. The shaving brush has been in much use this afternoon and zip lock bagging of figures has commenced. I think stage one will be to go through everything and try and get each figure bagged with whatever goes with it, be it accessories, tech specs, instructions, minicons etc. Then those that need more than a light dust will get that and I'll be on to doing some photos. Exciting.
I'm really up for doing any restoration needed on old G1 figures - never bought any repro labels. I think I have much to learn, especially about where to find spare parts for older figures as I have a few I picked up from friends over the years that need completing. First example is a G1 Skywarp with a few bits missing that could probably stand to have new labels and that was with a Dirge body that has nothing else. Big project, big pile of toys. Lots of memories. Was thinking maybe about blogging alongside doing it as I've been thinking a lot about the time these figures came from recently too. Must be the reaching 40 thing.
|
|
Hero
Fusilateral Quintro Combiner
   King of RULES!
Everything Rules
Posts: 7,506
|
Post by Hero on Jan 25, 2014 20:18:18 GMT
I like this thread a lot. I have a light tent but don't use it much, and when I do it is aside my large living room patio window additionally with two large sheets of white card. I have the same spotlights as seen in the first pic and angle them on a large black background for those dark background shots. For indoor pics, I normally use Tungsten setting for my white balance. For me, I like space as much as light for depth of feel. Oh, and if toy pics are your thing, give this thread a look:  |
|
|
|
Post by Pinwig on Feb 1, 2014 19:48:19 GMT
I mentioned in the Grimlock thread I started experimenting this afternoon. I wanted to try and photograph this chap for Hero's decoupage project. He was almost too big for the stage, and it didn't quite work, but this is my work in progress so far...  |
|
Deleted
Deleted Member
Posts: 0
|
Post by Deleted on Feb 1, 2014 20:33:13 GMT
Again, another marvelous pic. The figure lends itself very well to a proud static pose so you're on to a winner there already. The only reservation I have (and I'm wondering if it's my own screens brightness now) is how much light he's bathed in. there's a certain graininess on the background too which makes me think it's something to do with the ISO settings? As an experiment, I've put your photo through Windows 8 Photos and tinkered with a few brightness settings. I turned the brightness down a little to remove a bit of the glare, increased the contrast to pull a bit more colour out and increased the shadow to drown out the graininess in the background. 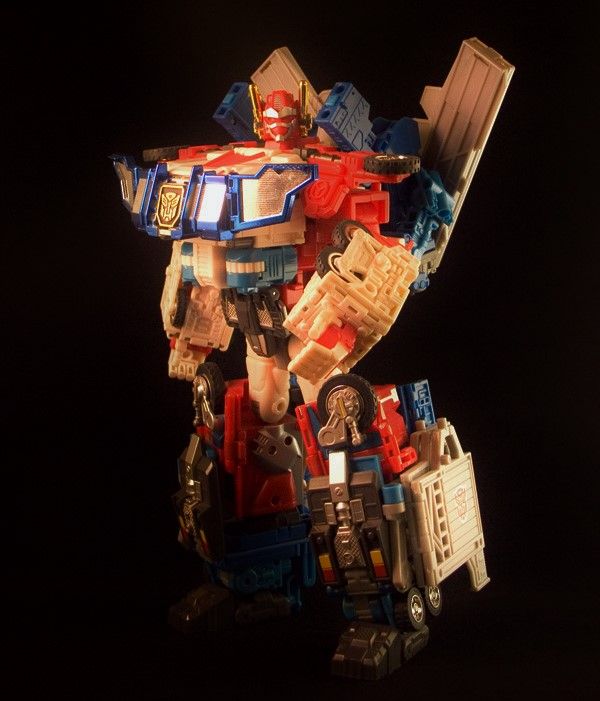 Other considerations are the format the pictures are in. I probably loose quite a lot going from a high-res image to a compressed image when I host it on photobucket. As far as I can tell, you upload directly so probably get a cleaner finish. I wonder if the same benefit I mention in the Grimlock thread, depth of focus, also has a negative in that it tries to pull detail out of a background that has none? Purely speculation because as I said, I'm no photographer, but that fact in itself is making this whole thing rather exciting...  |
|
|
|
Post by Pinwig on Feb 2, 2014 11:25:55 GMT
Again, another marvelous pic. The figure lends itself very well to a proud static pose so you're on to a winner there already. The only reservation I have (and I'm wondering if it's my own screens brightness now) is how much light he's bathed in. there's a certain graininess on the background too which makes me think it's something to do with the ISO settings? Hmm. As said in the other thread, I was shooting on auto so I wasn't looking at ISO settings. I've never really understood what they are. The grain in the backdrop might have something to do with the material, it's a kind of felt like finish? not smooth. The data from the RAW images I took says that the Omega Prime ones were ISO 200. Need to read what that means. I found the further I moved the lights away from the box the more even the lighting became, this figure is so big it might be that they just weren't far back enough. By this point I was finding that I liked one light set back so it shone through the figure's legs, which helped stopped them getting lost in blackness, and the other raised up a bit (in fact on the top of an upside down washing basket) as it gave a slightly different angle. Twisting the lights on the spot also made a huge difference to the way it fell on the figure. That's interesting to see. I'm wondering if my monitor is not calibrated properly and that I'm seeing my images as darker than you are. That's a definite improvement, but I think I'd want to lighten the back leg so it doesn't get so lost in the backdrop. This was why i was intending to use the white cloth, but as I said, the figures just looked rubbish against it. Yes, I have my own little server for various bits and bobs, so I'm just chucking them up there at the moment. These downsized versions are just jpegs exported from photoshop with a reasonably high quality setting. It is. I'm really intrigued by this. I just wish I had more time to experiment. I think I spent about 6 hours yesterday afternoon getting as far as I did. The last problem I had to solve was the auto focus. With the camera closer to the figure it kept focusing on the hand and blurring the head, which looked rubbish. The camera does have a manual focus - but both viewfinders are digital, so it was impossible to tell if it was focussed or not anyway. In the end I found I had to centre the head in the frame, half press the shutter release to focus on that, and then move the camera back before fully pressing. The auto focus must go for what is bang in the middle of the frame. |
|
|
|
Post by Pinwig on Feb 9, 2014 13:47:33 GMT
Spent yesterday afternoon experimenting again, trying to get a set up that I can reproduce each time and just put figures in to photograph. It doesn't really work like that though. What I have found, for all his faults, is that FoC Grimlock just loves the camera. He photographs really well. I've solved last week's chest glare and am quite pleased with these:    I also had a second go at trying to get a better picture from Warbot Assaulter:  And tried to do a few of Quakewave - but his eye light seems to upset my camera.   So what rules am I managing to define from all this? 1. Do it in the dark, ambient light from windows doesn't help. 2. Keep the lights for the mini studio close to it. Drawing them back further away may help reduce heat spots in the picture, but it introduces ambient light that will flood the background and introduce noise into your picture. 3. Have one light higher than the other, I had one sat on a box 20-30 cm off the ground level. This gives different angles for the light. 4. Twist the lights so they point forward toward the camera rather than backwards so you don't light behind the figure. There is enough light coming from them that you don't have to have them pointed directly at the figure. 5. Stand the lights toward the front of the studio, that seemed to reduce the white edges on the photos 6. Stand the figure as close to the middle of the studio as possible and keep rotating it slightly to reduce the glare off surfaces. 7. Focus the camera on the head of the figure. 8. Put the mini studio on a table and use a normal camera tripod on the floor in front of it. Gives a little more versatility in moving it and saves neck cramps. 9. Under expose the camera (at least in my case) as it gives a better image 10. Shoot in RAW mode rather than jpeg because this gives a massive amount of extra options in photoshop to tweak and improve colours/contrasts when you import the image. I'm really interested to hear about any experiments with lights and positions of them, as this is what seems to make or break a picture. I ended up with them set up like this for the photos taken above, with slight twists left and right mainly on the lower one to reduce glares or light dark patches:  |
|


 ).
).


 ).
).


